██████╗  █████╗ ████████╗ ██████╗██╗  ██╗
██╔══██╗██╔══██╗╚══██╔══╝██╔════╝██║  ██║
██████╔╝███████║   ██║   ██║     ███████║
██╔═══╝ ██╔══██║   ██║   ██║     ██╔══██║
██║     ██║  ██║   ██║   ╚██████╗██║  ██║
╚═╝     ╚═╝  ╚═╝   ╚═╝    ╚═════╝╚═╝  ╚═╝
███╗   ███╗ █████╗ ███╗   ██╗ █████╗  ██████╗ ███████╗██████╗
████╗ ████║██╔══██╗████╗  ██║██╔══██╗██╔════╝ ██╔════╝██╔══██╗
██╔████╔██║███████║██╔██╗ ██║███████║██║  ███╗█████╗  ██████╔╝
██║╚██╔╝██║██╔══██║██║╚██╗██║██╔══██║██║   ██║██╔══╝  ██╔══██╗
██║ ╚═╝ ██║██║  ██║██║ ╚████║██║  ██║╚██████╔╝███████╗██║  ██║
╚═╝     ╚═╝╚═╝  ╚═╝╚═╝  ╚═══╝╚═╝  ╚═╝ ╚═════╝ ╚══════╝╚═╝  ╚═╝
Patch Manager
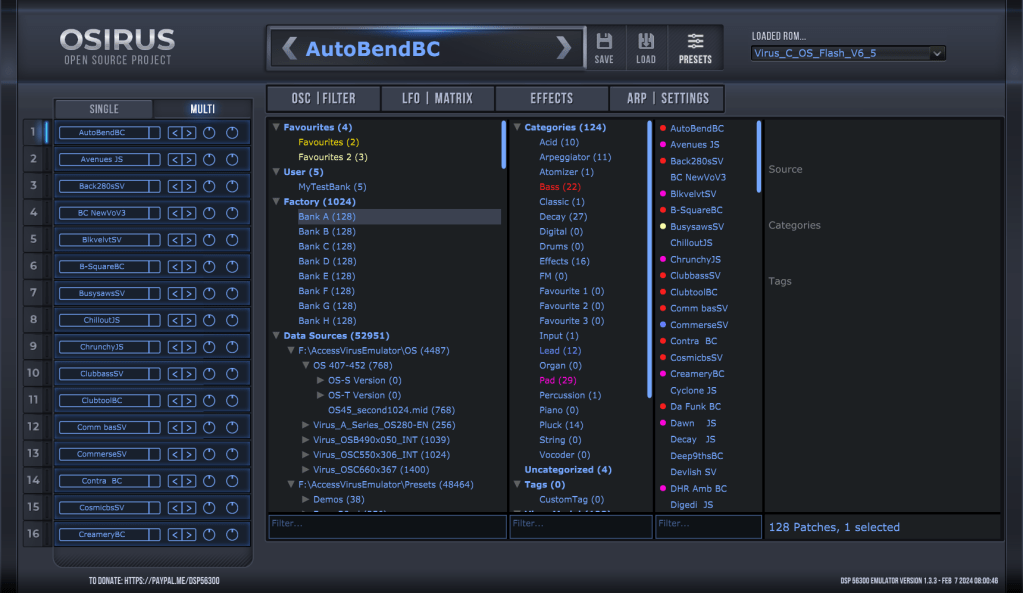
The Patch Manager is the central hub for organizing, browsing, and managing presets across all Gearmulator emulations. It replaces the earlier Preset Browser with a modern database-driven approach — instead of navigating banks and files on disk, you work with categories, tags, and favourites to find and organize your sounds.
The Patch Manager is part of the plugin itself and can be accessed by clicking Presets (Osirus), Patches (Vavra), or Browser (OsTIrus, Xenia, NodalRed2x, JE-8086) depending on which emulator you are using.
Supported File Formats
The Patch Manager can import presets from a wide range of file formats:
All Emulations:
.syx/.mid— Standard MIDI System Exclusive dumps.fxb/.vstpreset— Presets saved by DAW (VST2/VST3 format).cpr— Cubase Project Files containing presets
Osirus / OsTIrus (Access Virus):
.syx/.mid— Virus A/B/C/TI/TI2/Snow preset dumps.mid— Virus A/B/C OS Update files (factory presets are extracted automatically).lib— SoundDiver library import for Virus A/B/C presets.vti— Virus TI backup files.tfx— TDM plugin presets (Pro Tools)- Virus TI “Total Integration” control presets
- TC Electronic PowerCore presets
Vavra / Xenia (Waldorf):
.syx/.mid— microQ / Microwave II/XT preset dumps
NodalRed2x (Nord Lead):
.syx/.mid— Nord Lead 1/2/2x preset and performance dumps
JE-8086 (Roland JP-8000):
.syx/.mid— JP-8000/8080 Patch and Performance dumps.pat— JP-8000/8080 Patch files.pfm— JP-8000/8080 Performance files
Data Sources
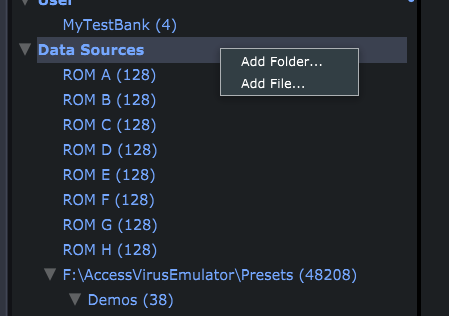
Patches are provided by various Data Sources. Where applicable, ROM/factory presets are automatically added (not for Waldorf or Nord synths due to the way they work in the hardware). Additional patches from disk can be added via right-click on the Data Sources node — select a file or even a whole folder to add it to the database. Folders are scanned recursively, so you can point it at your entire preset collection.
It is highly recommended to keep your patches and banks located on disk separately from your plugin and config folder locations to avoid operating system permissions issues and to prevent slowness of startup performance.
An important note about memory (RAM) usage
Each patch that is included and indexed within a DataSource impacts RAM memory usage for each instance of the plugin. This utilizes 512 bytes per preset plus a little extra overhead in general for the patchmanager itself. If you have HUGE numbers of patches specified in your DataSource folder(s) each instance of the emulator will “cost more RAM”. Be considerate of how many patches you keep “live” in your DataSources if RAM usage is a concern for you, especially if you are using multiple instances of a plugin in a project; this can add up quickly.
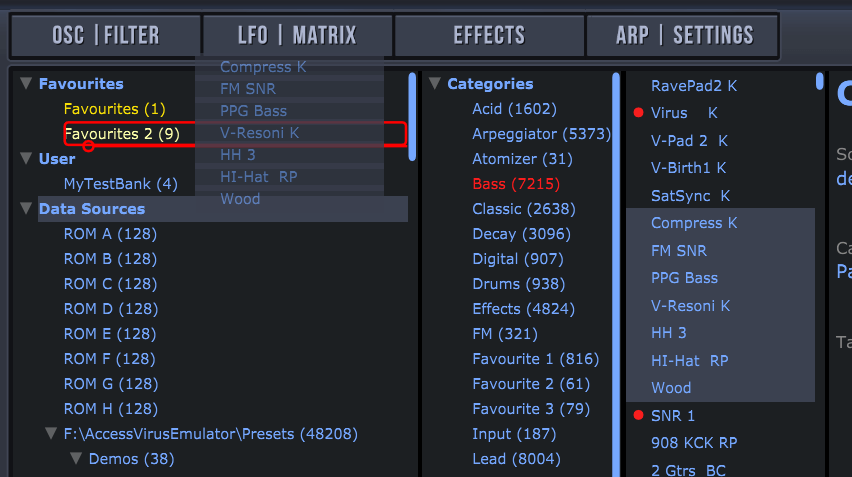
Categories, Tags & Favourites
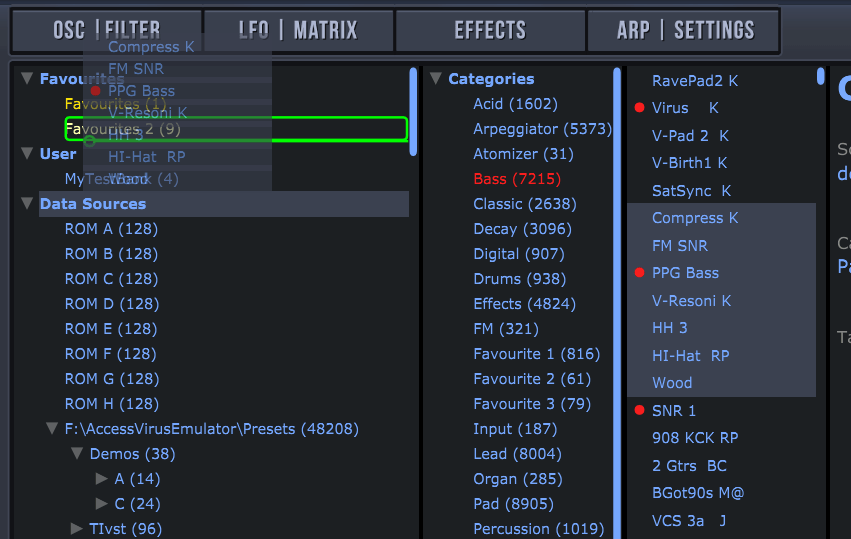
In the database, patches can be organized into Categories, Tags, and Favourites. Some manufacturers include category information in their patch format — you can modify these or create your own by right-clicking on the appropriate heading and selecting Add.
Key features:
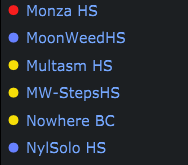
- Categories, tags, and favourites can each be colored — the color is displayed in search results for quick visual identification
- Text-based filtering allows searching data sources, tags, and patch lists
- Drag & drop to assign tags: drag patches onto a category/tag/favourite to add them. Hold Shift while dragging to remove
- Non-destructive: The original patch files are never modified. All changes (tag additions, removals, renames) are stored separately as deltas

Additionally, each emulation may define its own custom tag types. For example, Osirus provides Virus Model and Virus Features tags to help narrow down patches by hardware generation or synthesis features used.
Searching & Filtering
The Patch Manager provides several ways to find patches:
- Text search — Type in the filter bar to search patch names (case-insensitive)
- Tag filtering — Click on categories, tags, or favourites in the tree to filter the patch list
- Hide duplicates by hash — Removes exact duplicates from the list (same patch data)
- Hide duplicates by name — Removes patches with the same name
Searches run in the background, so the UI stays responsive even with large databases.
Patch List
The patch list supports two layout modes, selectable via the right-click context menu:
- List + Info view — Shows patches in a list with a detailed information panel
- Grid view — Alternative grid-based layout
Context menu options (right-click on patches):
- Export selected / Export all — Export patches to
.syxor.midfiles - Rename (F2) — Rename patches (User Banks only)
- Locate — Navigate to the patch’s data source in the tree
- Delete — Remove patches (User Banks only, with confirmation)
- Add/Remove tags — Assign or remove categories, tags, and favourites via submenus
- Hide duplicates — Toggle duplicate filtering by hash or name
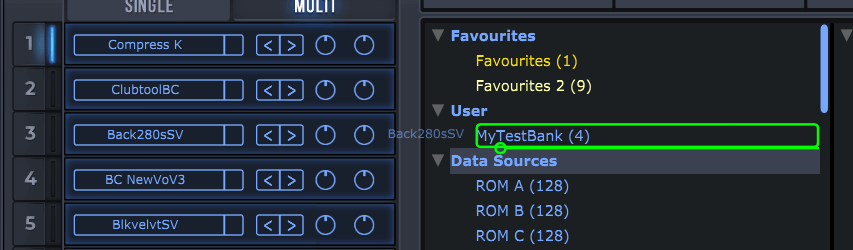
User Banks
User Banks allow you to save and organize your custom patches. Create a User Bank by right-clicking on User and selecting Create, then add patches by dragging them from the patch list into the User Bank.
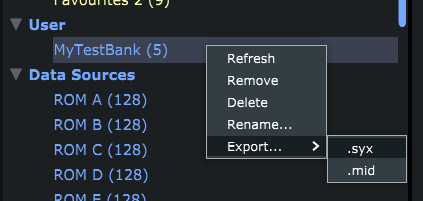
To export a User Bank for use with hardware, right-click to show the context menu and choose your export format (.syx or .mid).
If you intend to export a User Bank to the actual hardware synth, consider limiting the number of patches to fit within the hardware bank size (typically 128). Patches beyond the hardware limit will be ignored when importing.
Additional User Bank features:
- Paste from Clipboard — Paste patch data directly into a User Bank
- Reveal in File Browser — Open the storage location in your OS file manager
- Patches can be reordered within a User Bank by dragging
Patch Navigation
- Previous / Next patch navigation is available per part
- Program changes via MIDI are reflected in the Patch Manager — the selected patch updates automatically (read below for further configuration instructions)
- On multi-part synths, each part tracks its own active patch independently
MIDI Bank Assignment
The MIDI Bank Assignment feature allows you to assign MIDI bank numbers to data sources in the Patch Manager. Once assigned, you can select patches from that data source by sending standard MIDI Bank Select + Program Change messages — enabling hardware controllers, DAW automation, or external MIDI sequencers to recall any patch in your library without touching the plugin UI.
Please be aware that the standard MIDI Bank Select + Program Change approach described below does NOT work for VST3 format plugins (regardless of OS) at this time due to differences and limitations in functionality provided from Steinberg via the VST3 specification/SDK, and we are not the only plugin provider that is hampered by these issues. We are investigating ways to overcome/work around these issues but for now this is not possible with VST3.
How It Works
Each data source in the Patch Manager can be assigned a unique MIDI bank number (0–16383). When the plugin receives a MIDI Bank Select message (CC #0 / CC #32) followed by a Program Change, it checks whether a data source is assigned to that bank number. If a match is found, the corresponding patch is loaded automatically from that data source.
If no data source is assigned to the received bank number, the message is passed through to the emulated device as usual.
Assigning a MIDI Bank

- In the Patch Manager tree, right-click on the data source you want to assign
- Select “Assign MIDI Bank…“ from the context menu
- Enter a bank number (0–16383) in the text field that appears
- Press Enter to confirm
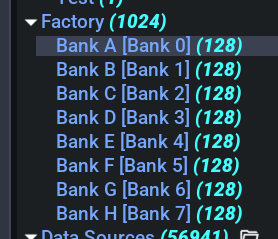
The data source now displays its bank assignment as a suffix, for example: “Factory Patches [Bank 5]”
Each bank number can only be assigned to one data source at a time. If you enter a number that is already in use, the assignment will not be applied.
Changing or Clearing an Assignment
To change a bank assignment, right-click the data source and select “Change MIDI Bank (Bank N)…“, then enter the new number.
To remove a bank assignment, right-click and select “Clear MIDI Bank (Bank N)”.
MIDI Banks Group
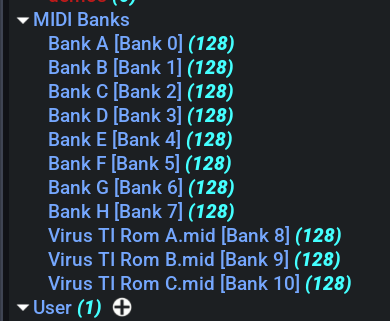
All data sources with assigned bank numbers appear in a dedicated MIDI Banks group in the Patch Manager tree, sorted by bank number. This gives you a quick overview of your current bank layout without having to navigate through the full data source tree.
MIDI Message Format
Bank selection uses the standard MIDI Bank Select mechanism:
| Message | CC | Purpose |
|---|---|---|
| Bank Select MSB | CC #0 | Upper 7 bits of bank number |
| Bank Select LSB | CC #32 | Lower 7 bits of bank number |
| Program Change | — | Selects the patch within the bank |
The bank number is calculated as (MSB × 128) + LSB. For example, to select Bank 5, send CC #0 = 0 and CC #32 = 5, then send a Program Change for the desired patch number.
Example Setup
A typical setup might look like this:
| Bank Number | Data Source |
|---|---|
| 0 | Factory Patches |
| 1 | User Creations |
| 2 | Rob Papen Soundset |
| 3 | Templates |
Sending Bank Select 2 → Program Change 15 would load the 16th patch from the “Rob Papen Soundset” data source.
Technical Information
Storage Format
The database keeps track of which data sources have been added, stored at:
(Windows) C:\Users\[username]\Documents\The Usual Suspects\[synthname]\patchmanager\patchmanagerdb.json
(macOS) ~/Documents/The Usual Suspects/[synthname]/patchmanager/patchmanagerdb.json
A binary cache (patchmanagerdb.cache) is maintained alongside the JSON for fast loading.
User banks are stored in the same folder in sysex format:
(Windows) C:\Users\[username]\Documents\The Usual Suspects\[synthname]\patchmanager\MyUserBank.syx
(macOS) ~/Documents/The Usual Suspects/[synthname]/patchmanager/MyUserBank.syx
Patch Modifications
Modifications to patches are stored as deltas next to the imported file. For example, if you imported:
Rob Papen Signature Soundset.MID
There will be a companion file:
Rob Papen Signature Soundset.MID.json
These JSON files store only the differences — added or removed tags compared to the source. Example:
{
  "patches": {
    "prog|0|hash|e1356f571f1194f5b3e3744321fca010": {
      "tags": {
        "category": {
          "removed": ["Favourite 3"]
        }
      }
    }
  }
}
In this case, the category “Favourite 3” has been removed from the first patch of that bank.
Patch Identification
Each patch is identified by an MD5 hash of its data. This allows the Patch Manager to detect duplicates and track patches across data sources even when files are moved or renamed.
Backup Strategy
- Imported patches: All tag modifications are saved as
.jsonfiles next to the source file. When backing up your presets, copy the.jsoncompanion files along with them. - User banks: Stored in the Application Support / Roaming folder (see above). Copy the entire folder, or the individual
.syxand.jsonfiles. - Recovery: If you accidentally remove a user bank from the database, you can create a “new” user bank with the same name. If the
.syxfile still exists on disk (they are never physically deleted), it will be loaded automatically — the Create effectively becomes an Add.